Home Assistant vol. 2
How UTM saved my home (for a week)

You may be wondering, why is this volume 2 when there seem to be no volume 1? That is a good question and reasons are simple. Volume 1 is in the past and is not worth going deeper into it hence I wont write separate post on that topic. Yet it was how all of this started in the beginning so lets have a look at some context :)
Vol. 1
For a brief introduction lets understand how my Home Assistant journey started. As a gadget lover I was having me eye on smart home for really long time. Given occasion to splurge some money on higher purpose I went into Aqara world. At that time (from my POV) it was one of the most cost and effort effective ways of getting into HomeKit corner of smart home world. It started with bunch of light switched, sensors and TRVs to control room temperature.
In the meantime I was getting deeper and deeper into smart home and from time to time I was stumbling on Home Assistant. When I moved to a new place sudden next occasion happened: I got into possession of old Mac mini meant to be decommissioned. Using this opportunity I have installed Ubuntu on that machine (previously running root locked Proxmox, which I should have read more about then) and finally on Ubuntu, using virt-manager I have started my journey with HAOS - Home Assistant Operating System.
Burning problem
Everything was great, till one day (or couple of days actually), when my electricity provider decided to make me a disco trip. There were two days across one week and at the end of that journey my shiny Mac mini was gone… Just dead, black screen and no reaction. Just by itself it was not that big of a deal. It was just some old crappy PC, yet together with this Mac: Brainz of my home BURNED!
I have sunk into world of convenience in my apartment pretty quickly to a level where sleeping anywhere else besides my home feels wrong. Yet loosing my automation and conveniences felt much worse. Kind of like I went back to the dark ages 😅 Not only that, but is my setup still there, or did I lost everything? I need to solve it and do it quick!
Even though I knew already what I need to aim for in the long run (hello Proxmox), this require additional hardware investments and time to get it and set it up. I needed something to help me sleep well again 🥹
Is there anybody out there?
Firstly I needed to know if there is anything to recover with that broken Mac. I have fished out its SSD, put it into USB disk enclosure and connected to my Mac. As expected it was unreadable, not due to being destroyed, but unsupported filesystem. It should be readable though by a linux machine and I will need some virtualization regardless to run. My initial thought was to use virt-manager as I did in Ubuntu fo rmy original mac. Even though it is not officially supported on Mac I have managed to install and run it. If you want to do the same this post by Artur Kozieł may be helpful. Keep in mind however, that both virt-manager and virt-viewer are both now available in homebrew core, hence there is no need to tap into custom installer from Artur.
Quick install of Ubuntu in virt manager and I was able to connect and read data from my SSD. In there I was also able to find my precious intact VM image of my Home Assistant image. First win!
Next thing was of course to run retrieved image of the Home Assistant. I tried running in in virt-manager as well and almost made it… Home Assistant was running, however I was unable to correctly bridge network through my mac to the HAOS VM. I was greeted with 'qemu-bridge-helper' is not a suitable bridge helper whenever I tried passing bridge device as network interface in VM setup.
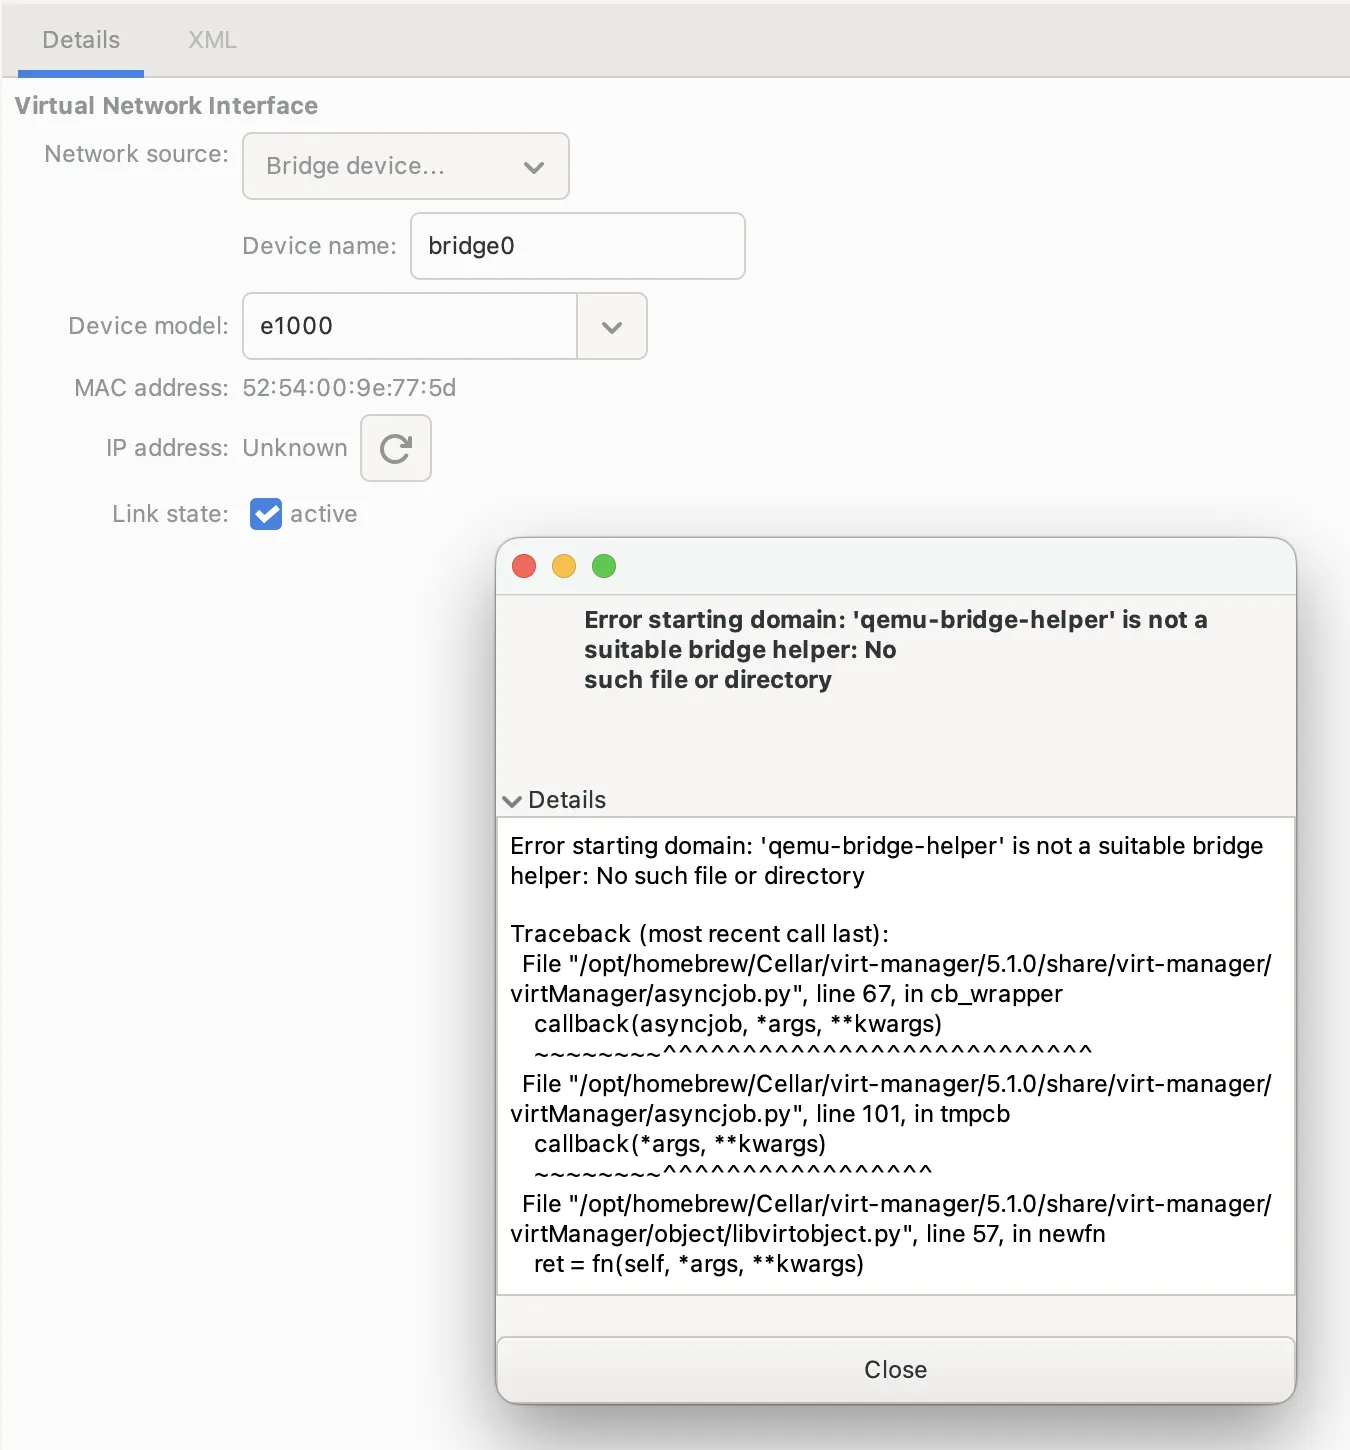
It seemed that it might be connected to missing privileges or just broken virt-manager installation. At this point I needed to look for alternative, especially that Mac OS is not officially supported platform.
UTM for the rescue
Upon further research I have found out UTM: QEMU based emulator and virtual machine host. It is built with mac os and iOS in mind, which is kinda crazy! Lets see if it solves my problem though.
Installation process is as simple as one could expect. Visit mac os installation page where you will find two main methods: App Store (49,99 PLN in Poland) and Github (standard dmg). UTM is completely free and open source, but buying App Store version you will support the team behind that product. If you find it useful I encourage you to do so if you can afford!
So we have UTM installed, now lets configure our virtual machine. This process is incredibly simple as well with one trick we will need to pull to use our existing image.
Now we need VM image to work with. I am using Home Assistant virtual machine in .qcow2 format which I had previously recovered from broken mac. Notice that it is meant for X86_64 systems. If you want to start fresh, maybe just test it out, you can get image from HA installation page. Later on we will go trough arm64 installation as well.
Keep on rollin, baby
Instructions below were tested on UTM version 4.6.5 (108).
Now lets make it work (again)! So we have VM image, to get started open UTM, by default on open you should see “Welcome to UTM” screen with. Select Create new machine. If you are past welcome screen you can use + button in top left corner or use File -> New in menu bar.
Now lets go through VM creation process, steps are simple and we will be using mostly default settings.
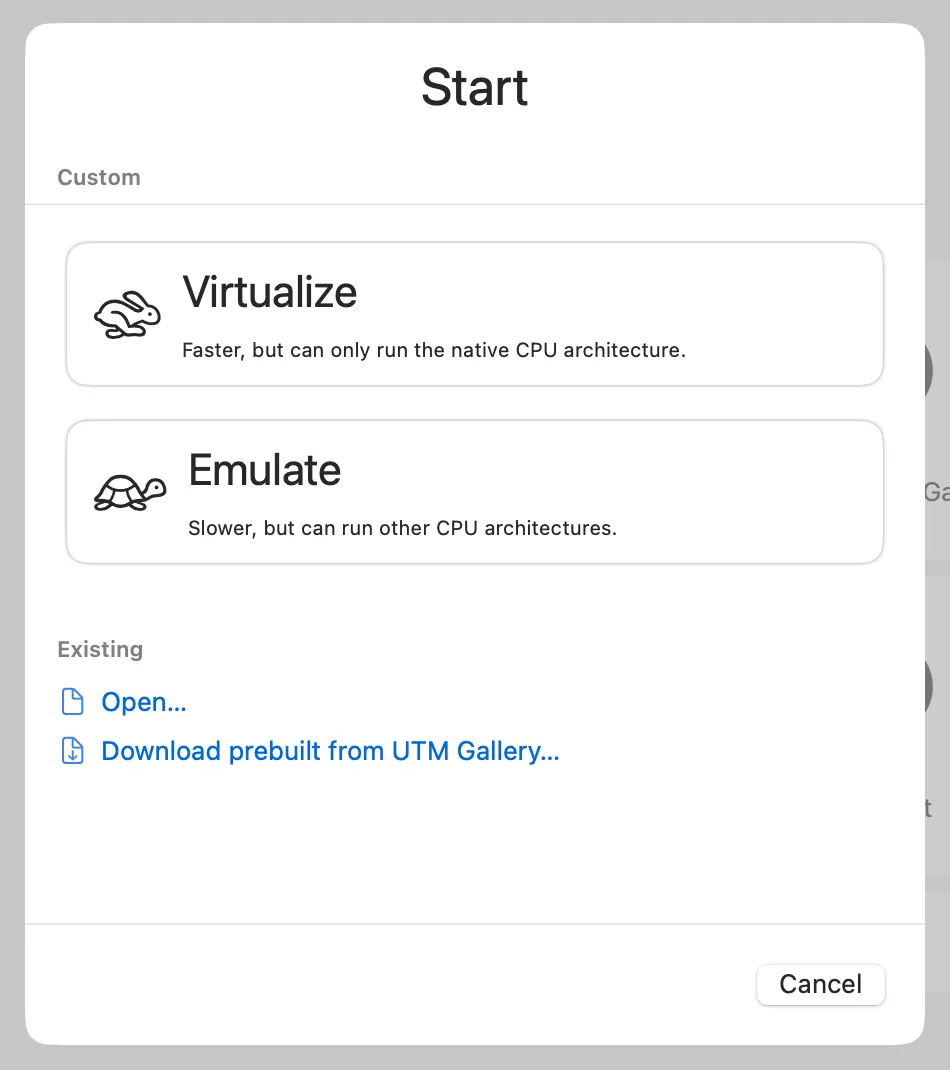
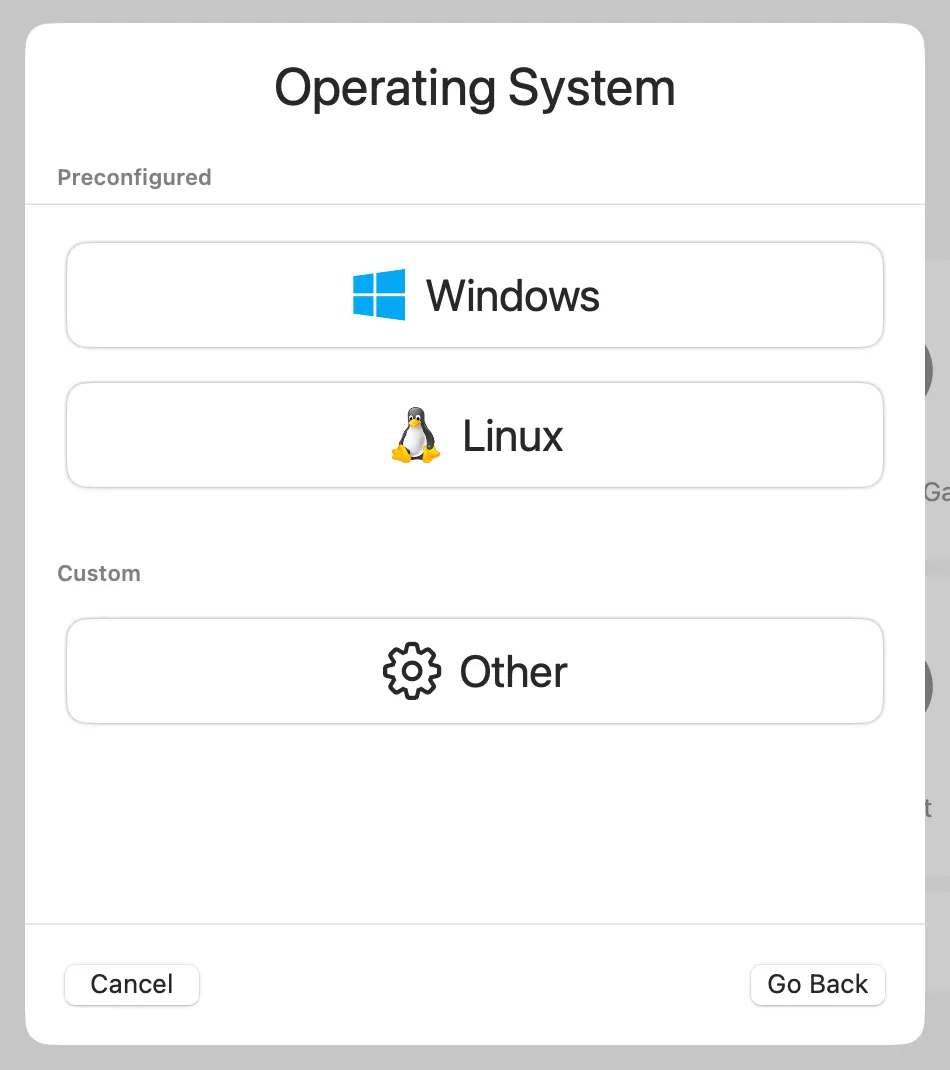
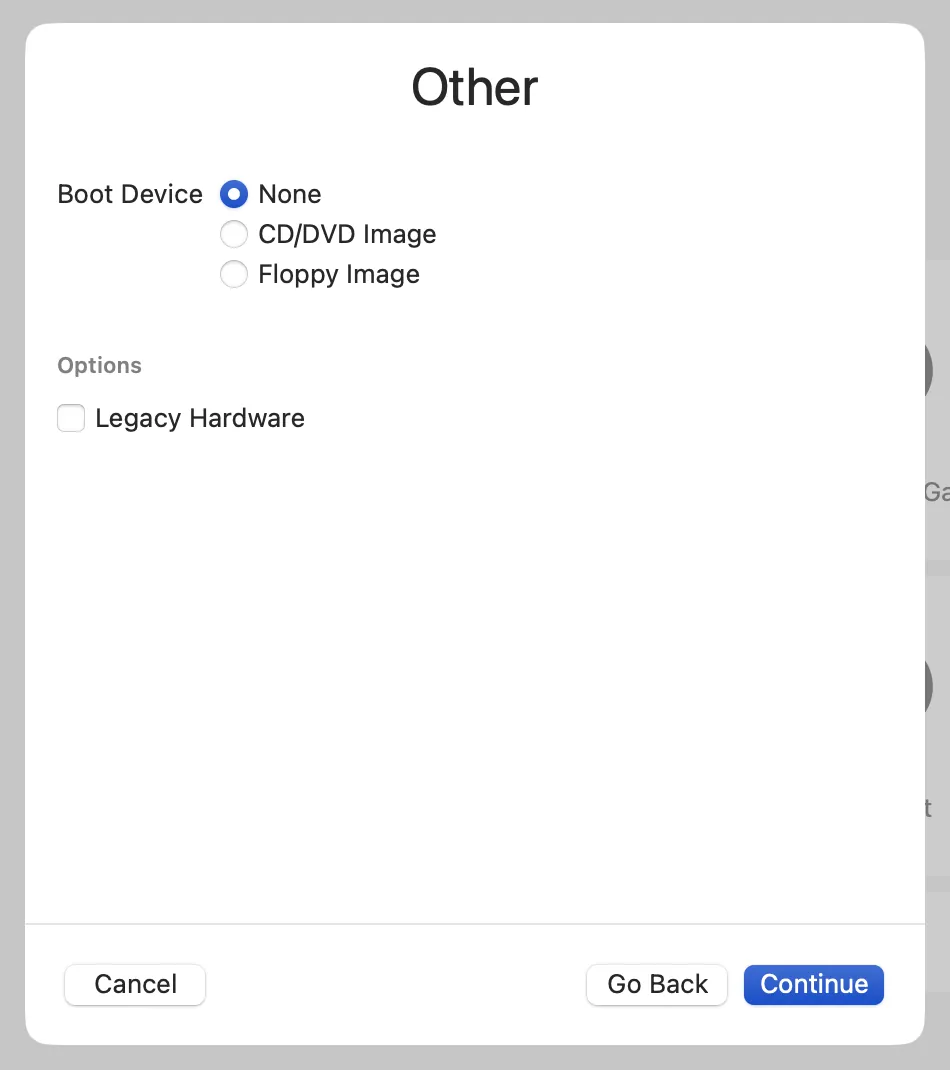
Based on the system you run you will have to select either Virtualize or Emulate. Since I am on Apple Silicon and need to run x86_64 image Emulate is my choice. Next in System Selection use Other. On subsequent screen you will see Boot Device to be selected, here we go with None as we already have VM image, no need to boot anything.
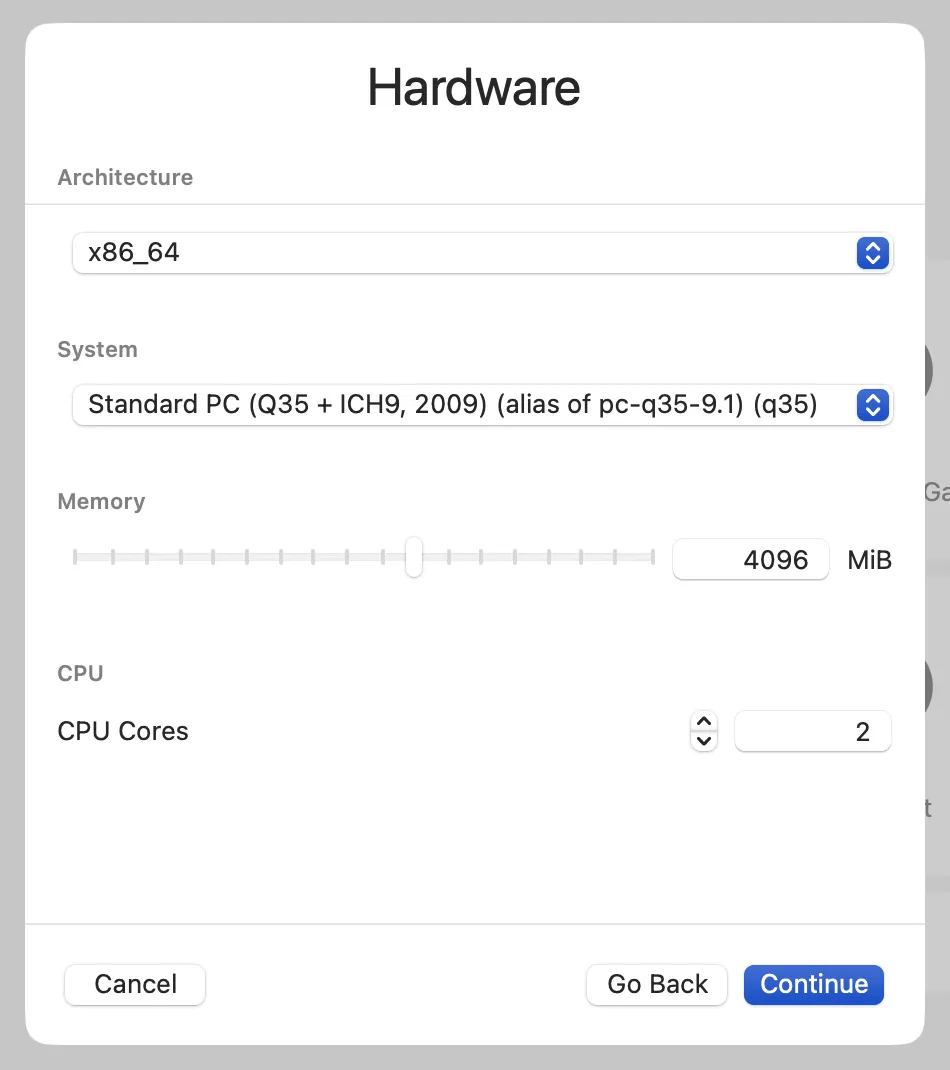
Next section is Hardware. Architecture should stay as x86_64 if you are using qcow2 image as me. System can stay at default Standard PC (Q35, ICH9, 2009) as well. Alternative here would be to select i440fx chipset, however I didn’t found any advantage in doing so. Minimum recommended requirements for Home Assistant are: 2GB Ram; 2 CPU cores; 32GB of storage. You will need to weight in capabilities of your machine. On mine I have plenty of Ram, hence I selected 8GiB (8192 MiB). When it comes to CPU 2 cores is enough since typically HA won’t be doing that much work anyways.
Subsequent storage section does not matter at all and this is connected to trick we need to pull, but more on that later. For now just use default settings (64GiB) and go to the next step. Shared directory won’t be of any use for me, hence I am also skipping that and leaving it disabled. I expect you won’t be needing that either, so just go with continue here as well.

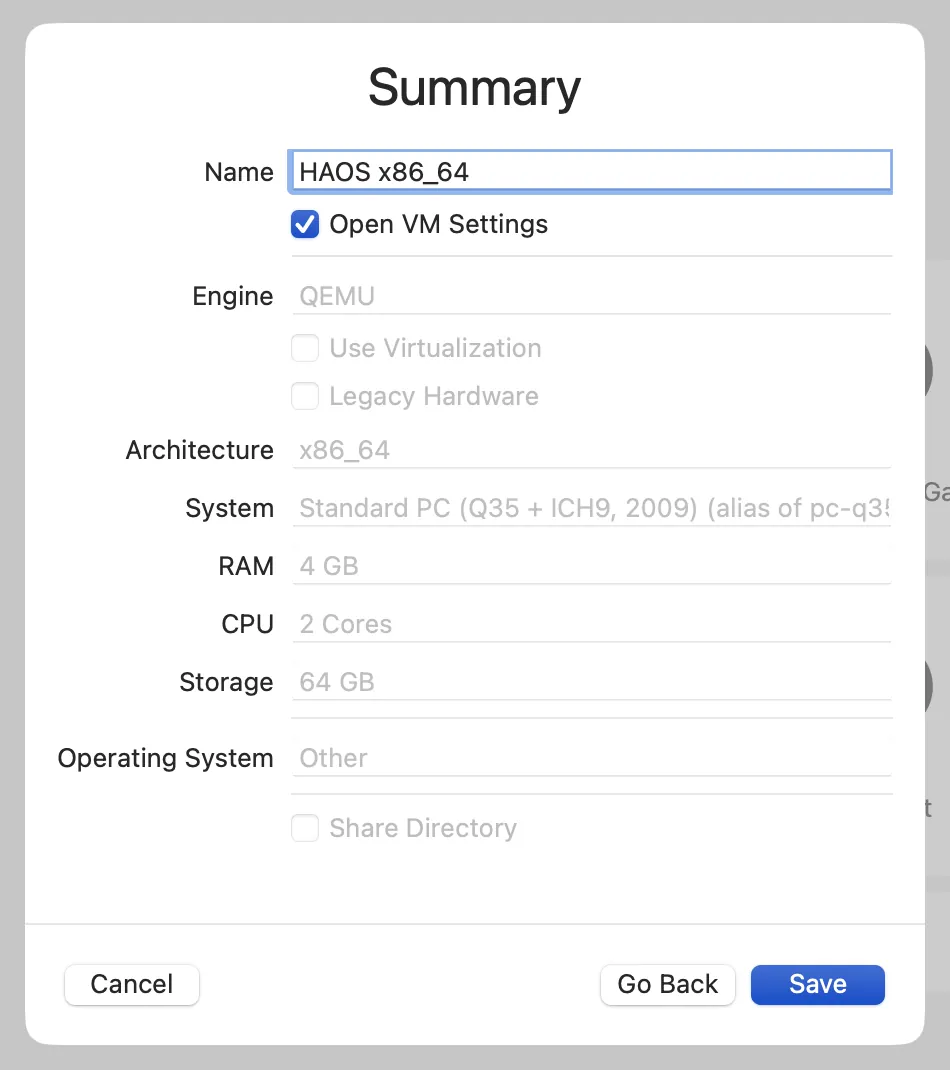
Summary - we are almost there, few more tweaks to be done, so check Open VM settings checkbox, also name your VM appropriately. I have used HAOS x86_64 in this case for clarity. Now click on save and you should be presented with configuration screen of the VM.
Next we go into VM configuration. If you didn’t selected open VM settings you can go here either by tapping settings icon on top right corner after selecting VM in UTM or by right click -> edit.
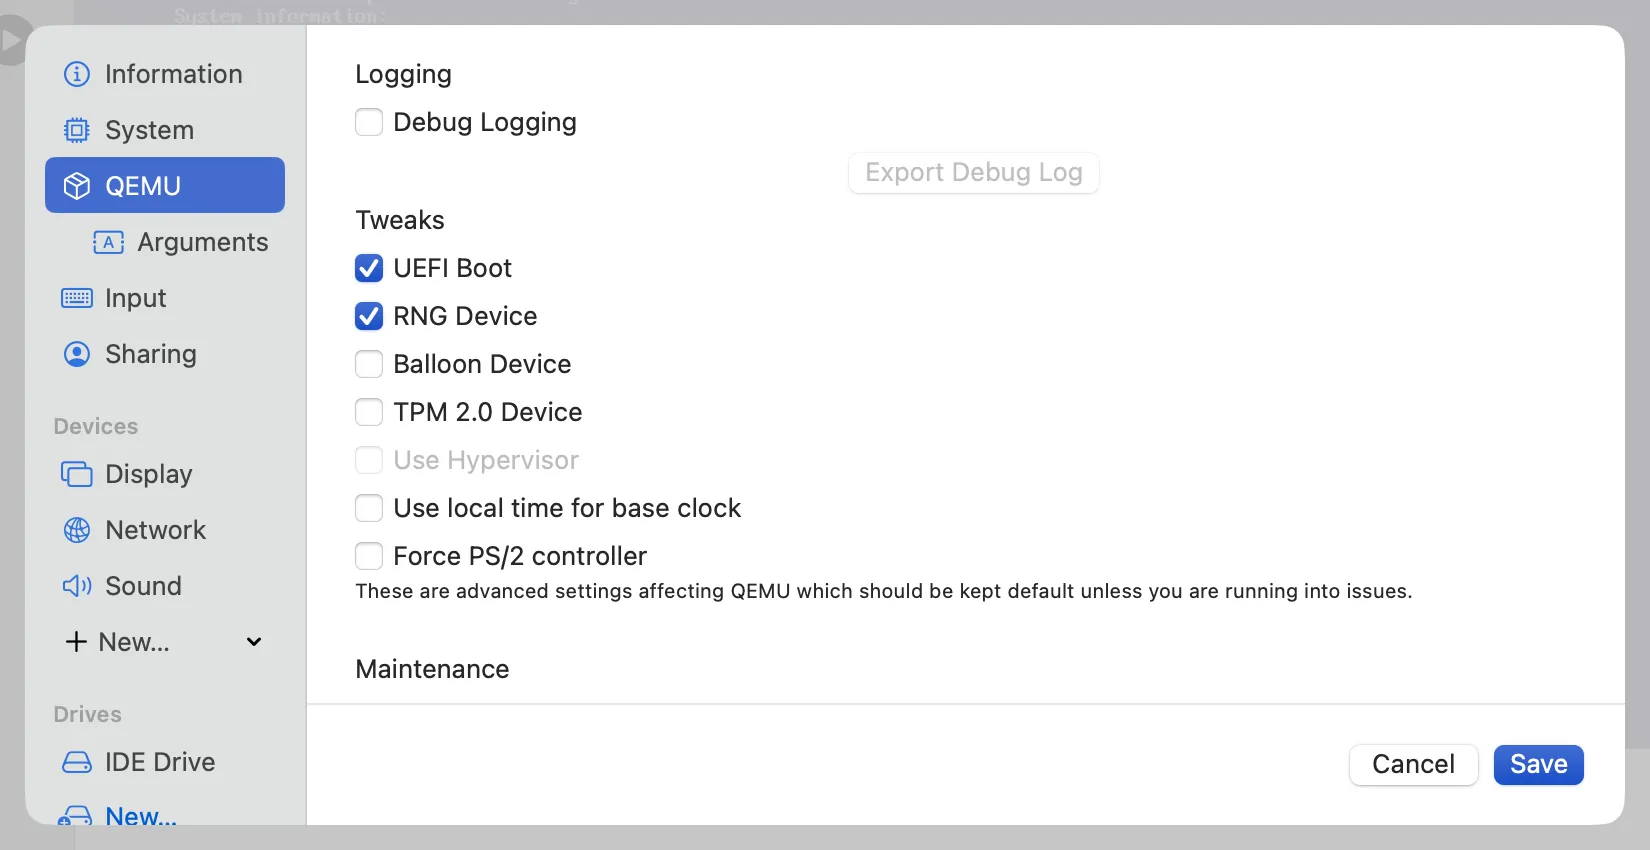
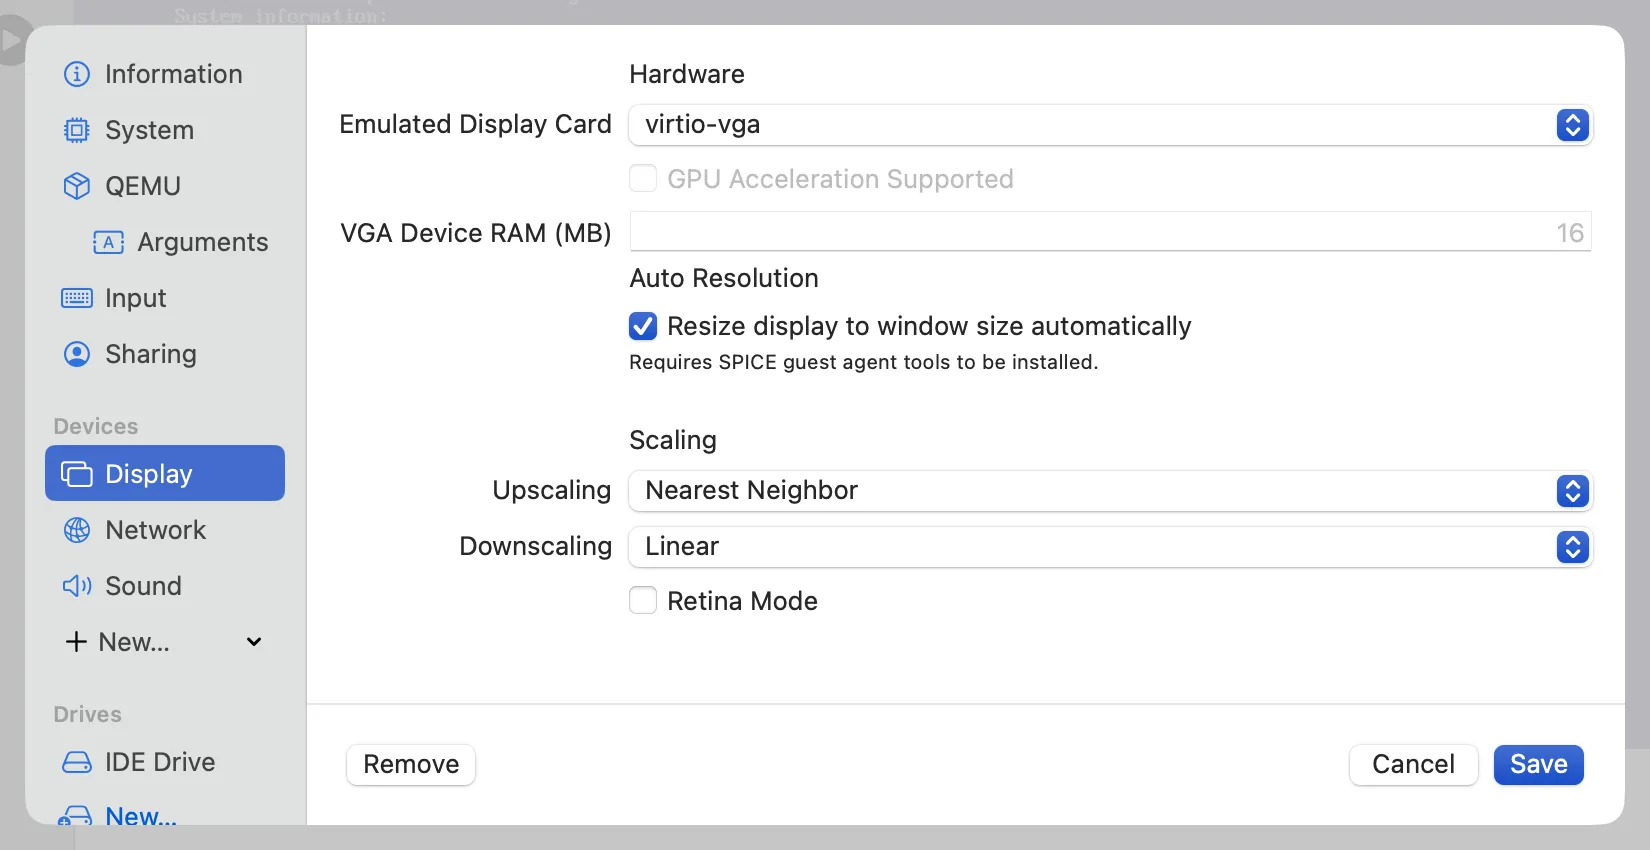
Qemu section uses default settings, similarly to display section. Those two however are the ones that might require some tweaks from you in case you will encounter troubles running Home Assistant (or any other) VM. My testing shows that HAOS likes UEFI boot and RNG Device settings. For arm64 image you may need to enable Use hypervisor as well. In case you face No display output you may want to tweak those parameters.
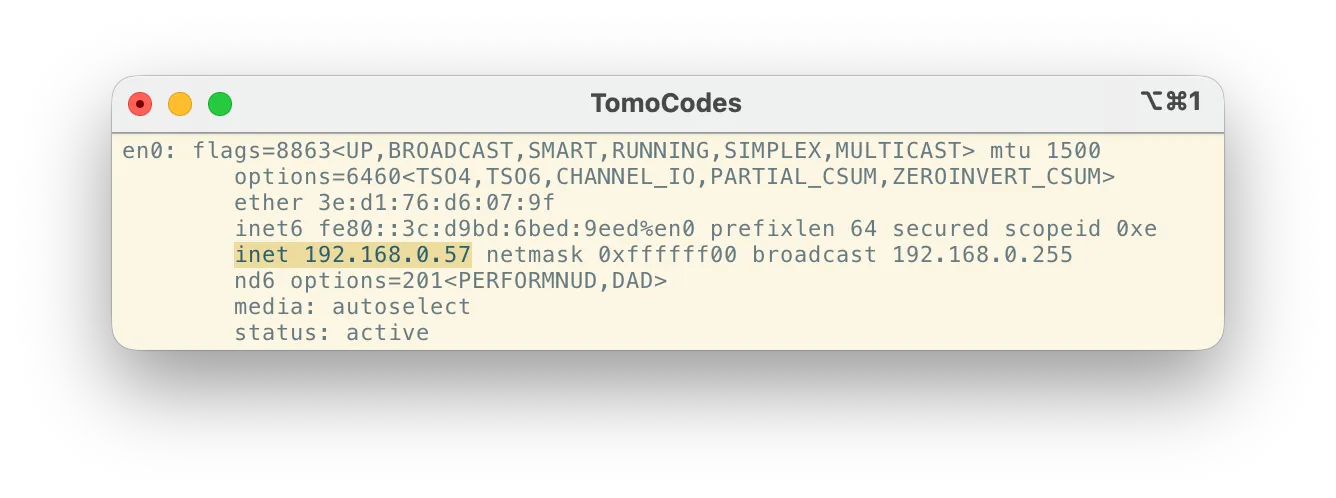
Next of is star of the show - why I even stumbled on UTM - network configuration. By default you will see shared network here which uses additional NAT layer for our VM. This is not what we want as it greatly complicates how Home Assistant interacts with our network. It has to reach our smart accessories, be able to discover those and be discoverable itself. This is where bridged networking comes into play. Such bridge allows us to grant ip address to our virtual machine in our default network subnet. For me this is 192.168.0.0/24.
configuration here is extremely simple and almost everything is done for us. Just change Network mode to Bridged (Advanced) and in Bridge Interface select your current active network interface. For me this was en0, you can find which one it would be for you by running ifconfig and checking which interface is in your default network subnet.
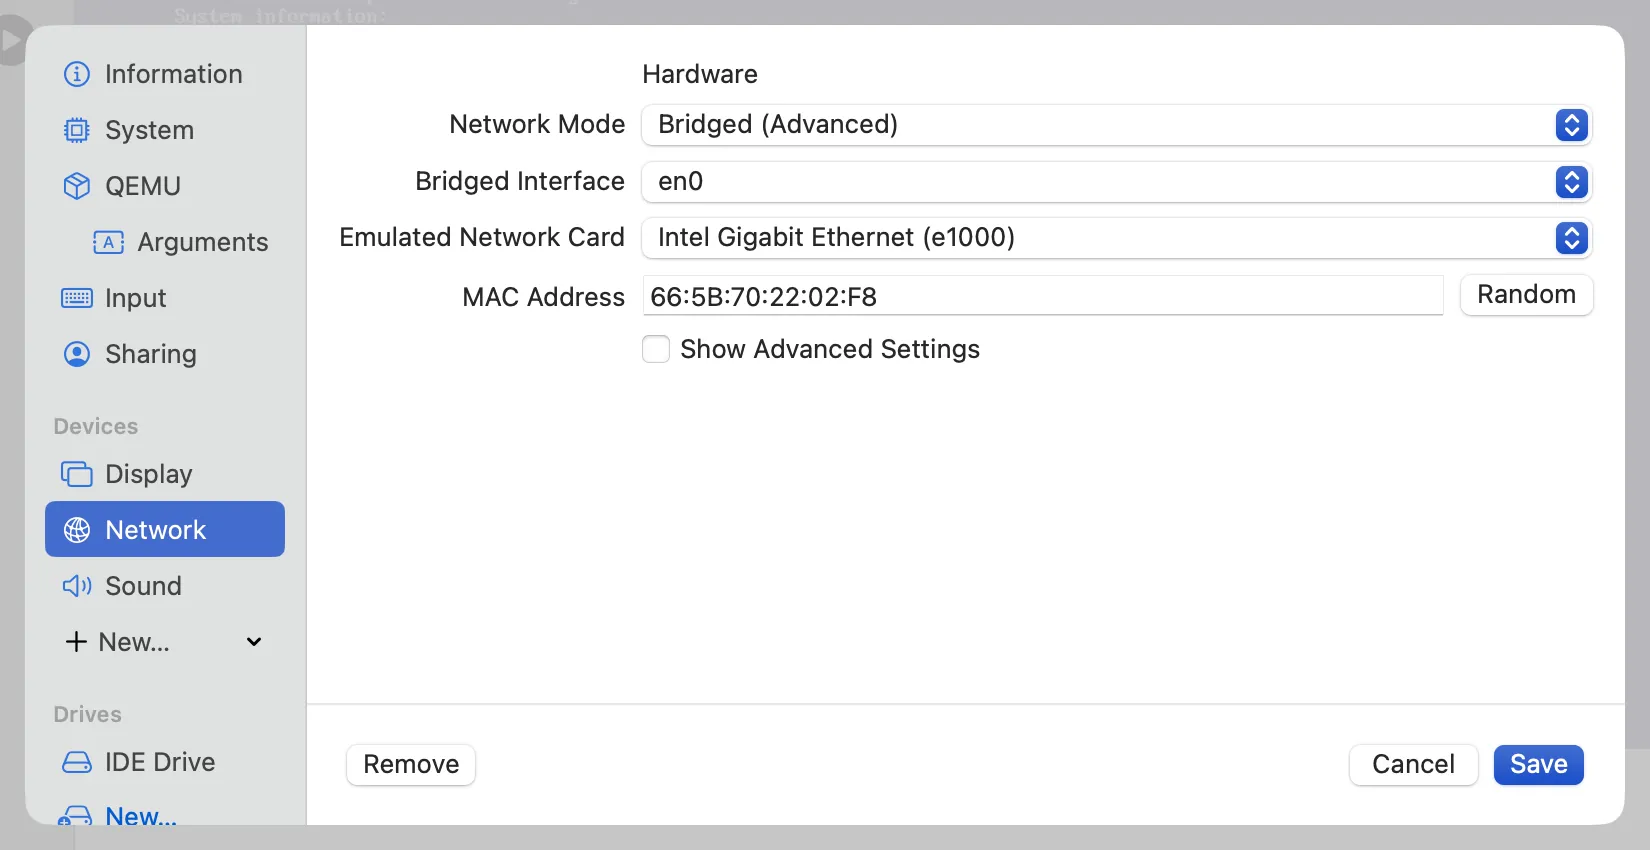
Our last step is to point our VM to image of HAOS - for some reason UTM does not allow to do that as a part of VM creation. At least I haven’t found that option…
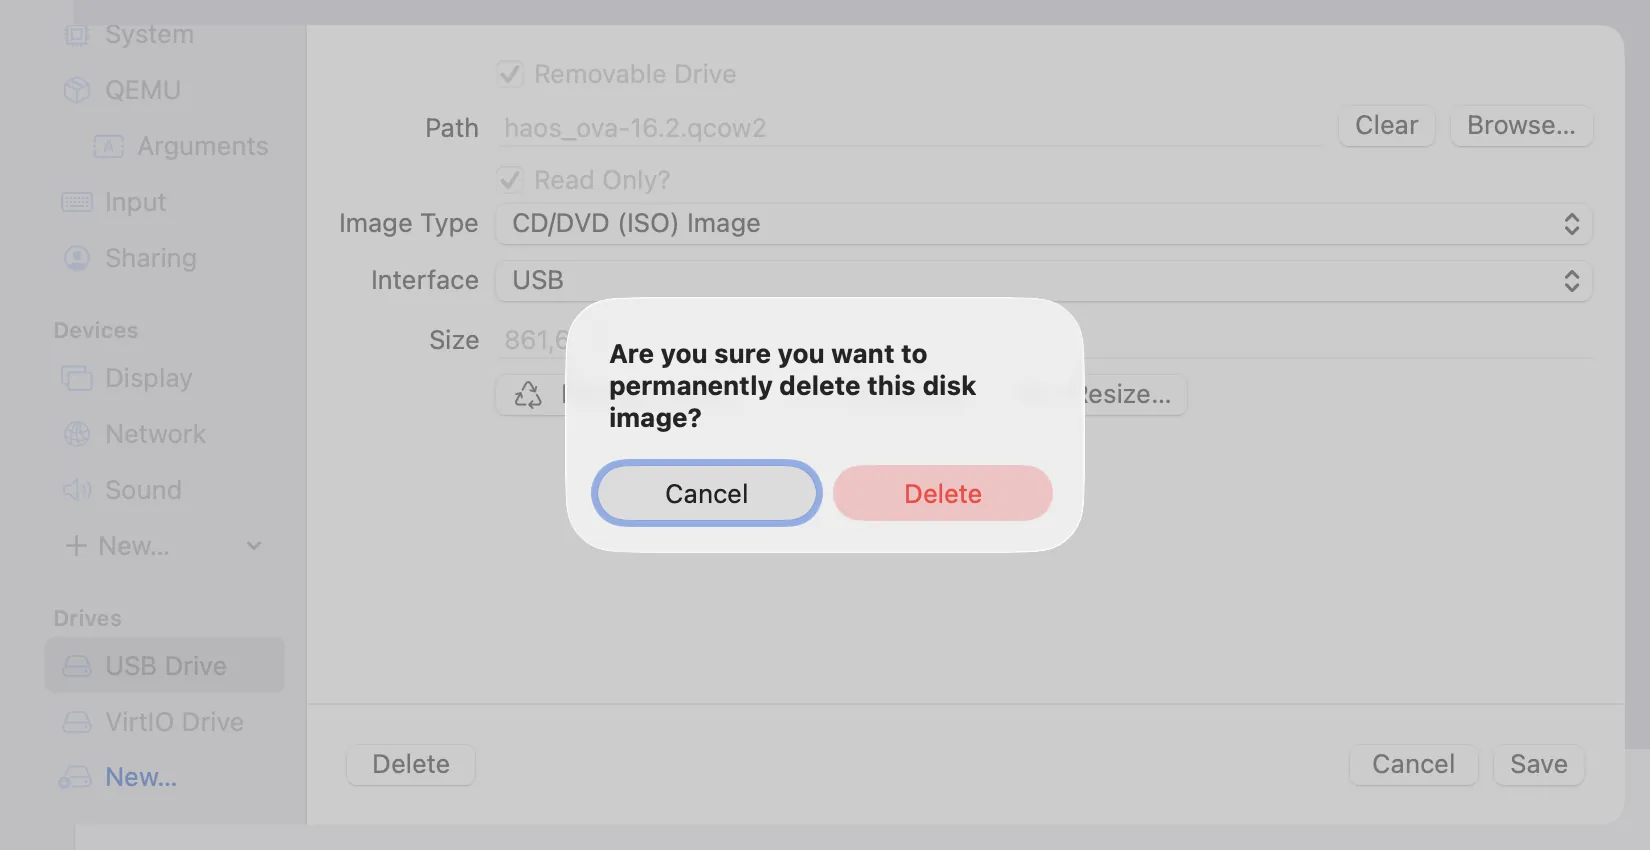
Scroll settings sections to the bottom and you will see drives. There should be one, but regardless of how many you have we need to get rid of all of them. Right click on drive -> delete -> confirm delete.
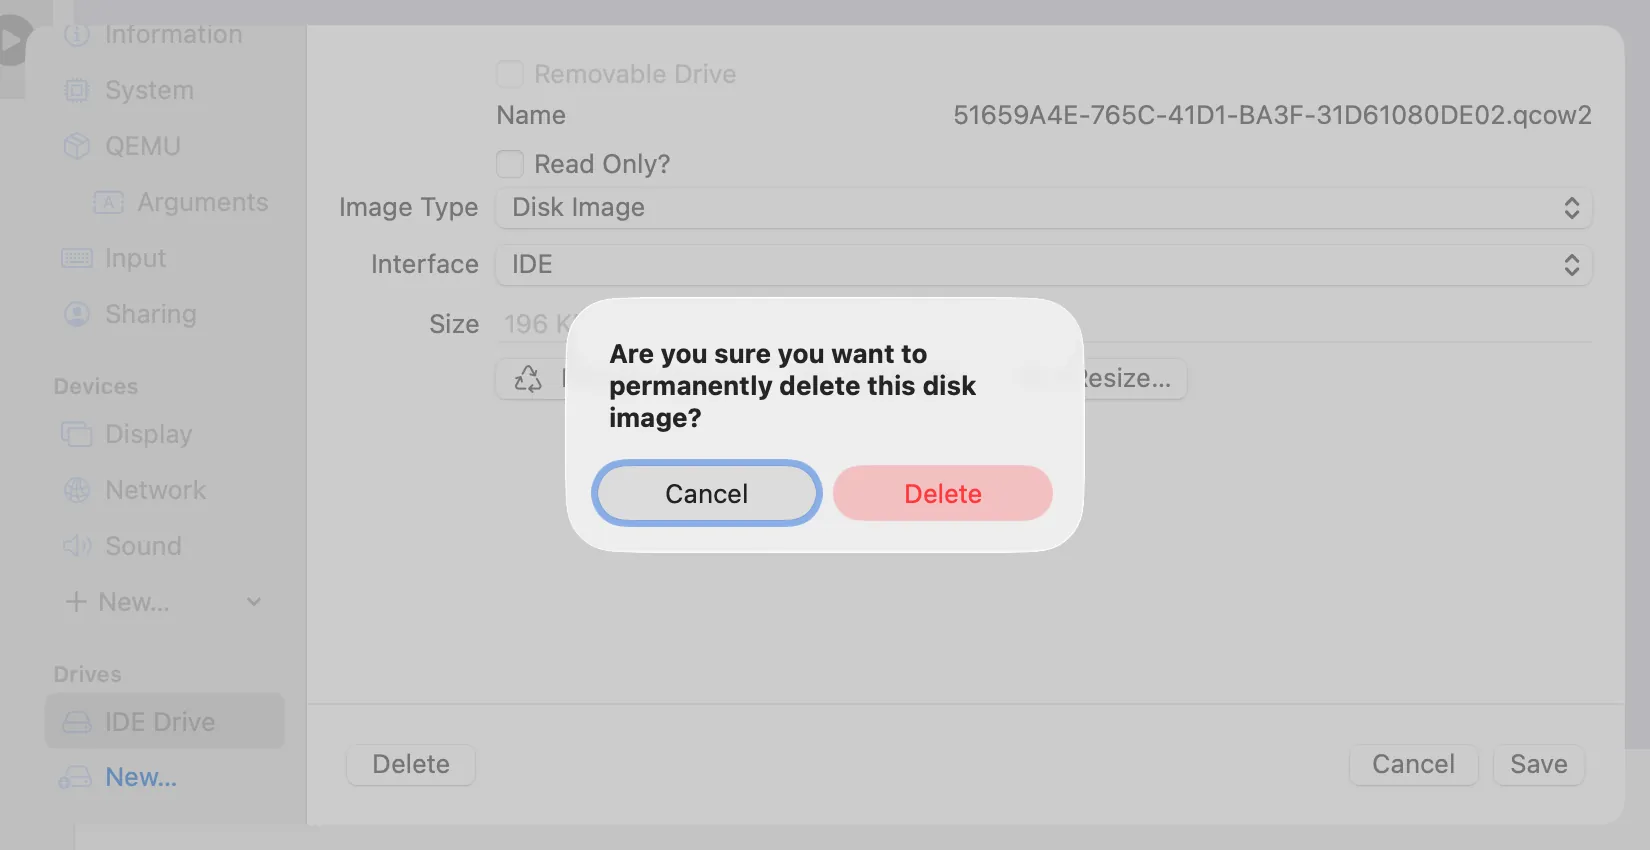
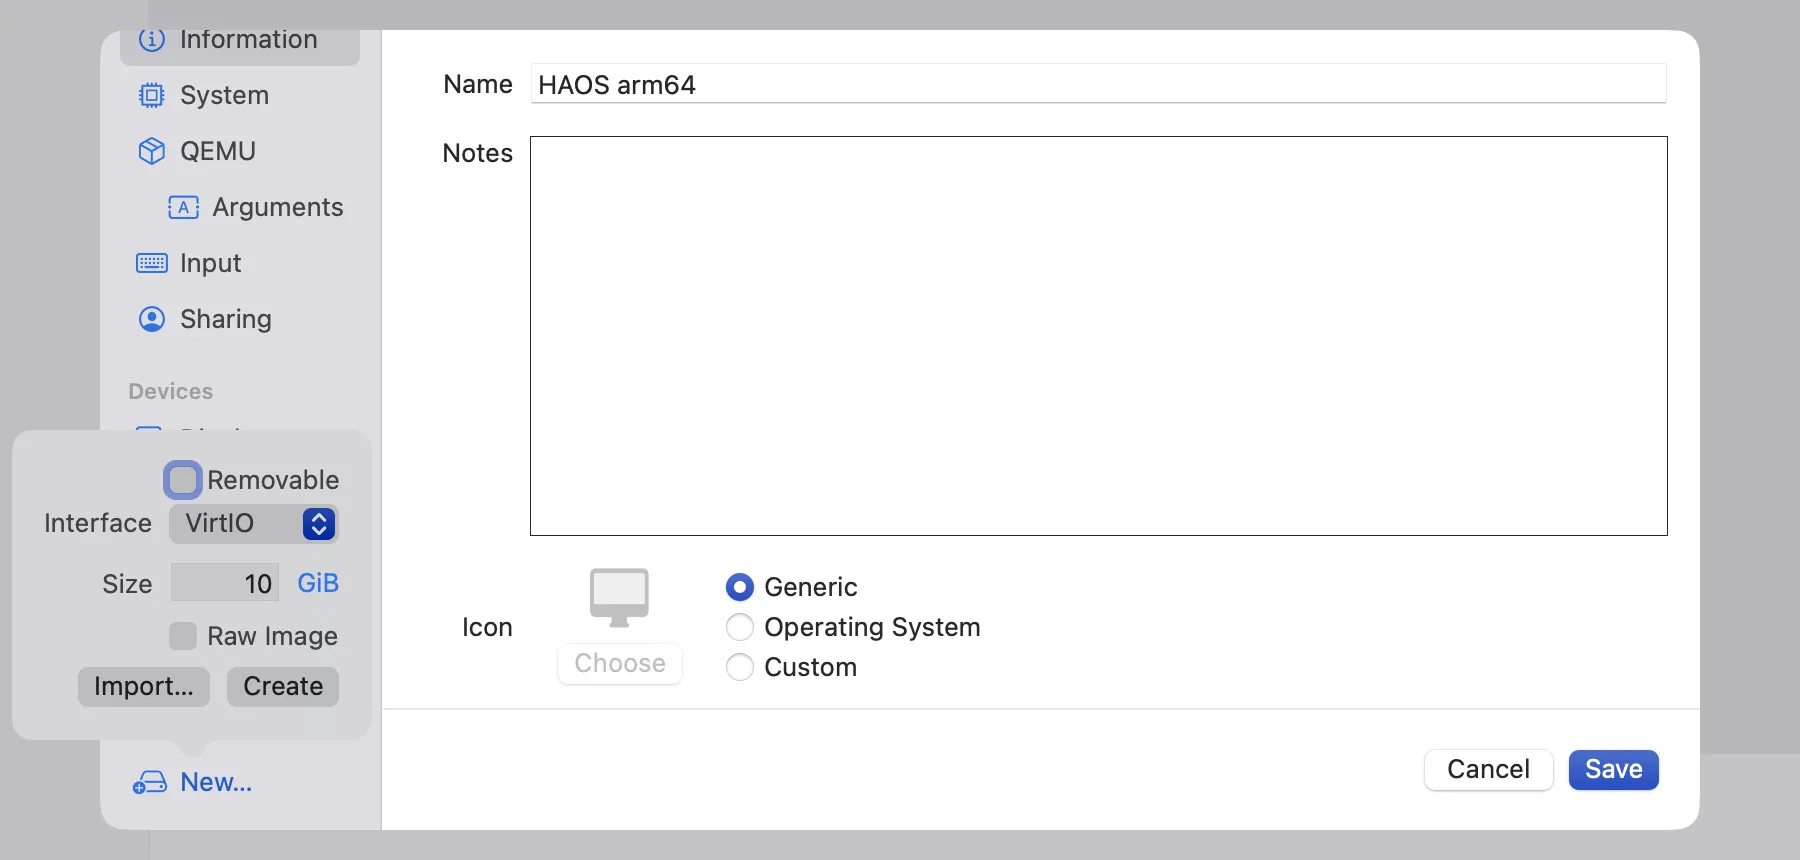
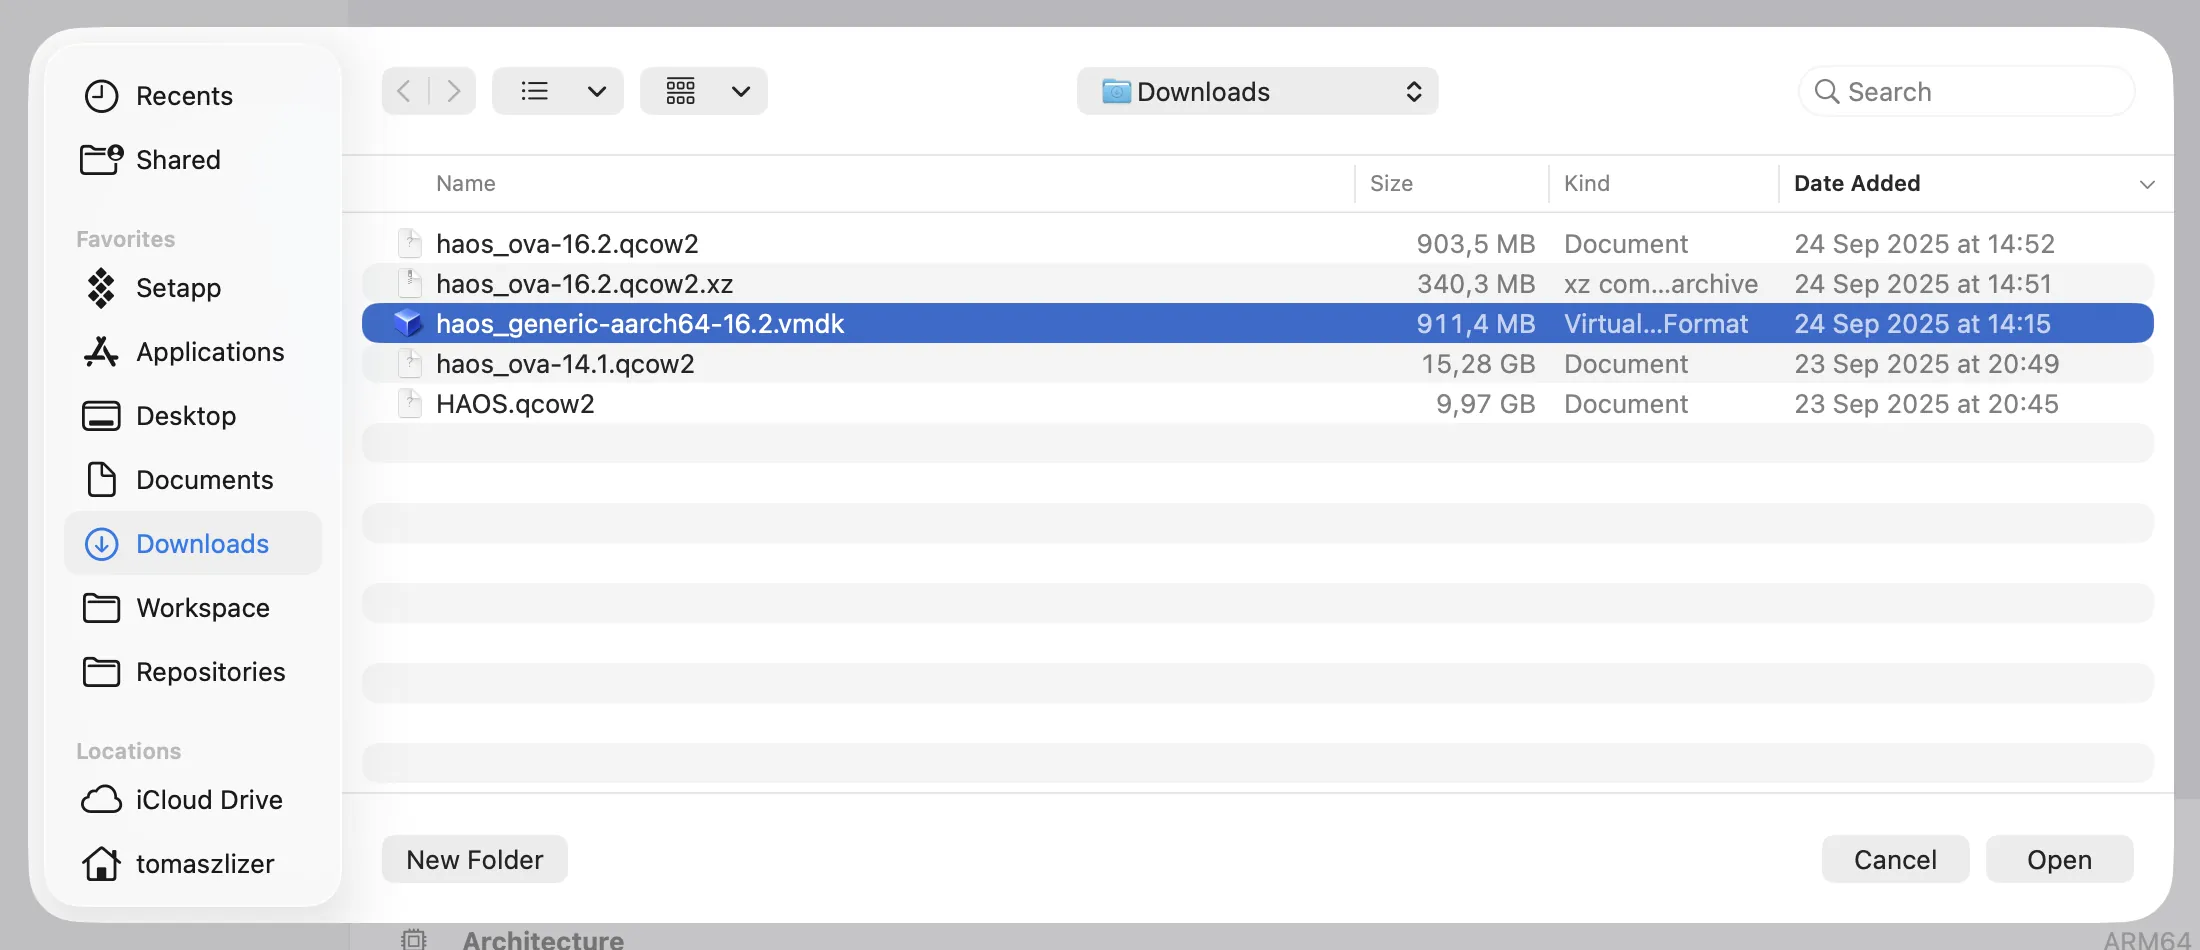
When you empty all drives that were created for us, we nee to create one we will actually use. Click on New under drives section, select IDE interface and click on import.... Then select VM image you want to use and confirm selection with open. You should end up with something like screen below:
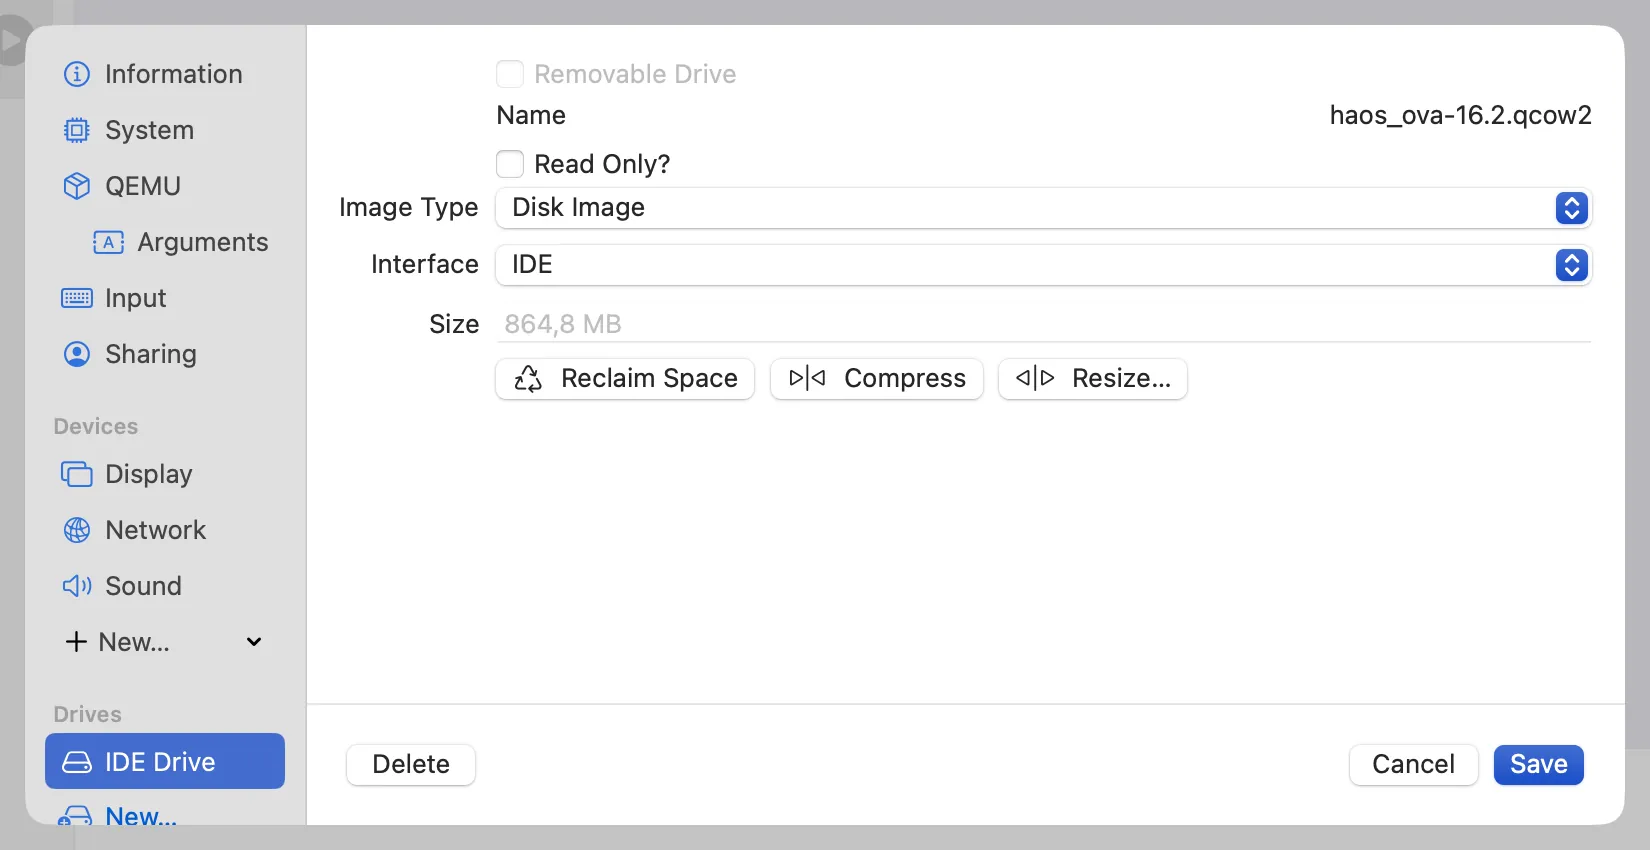
After completing those steps you should be ready to go. Start, wait and voila - my smart home (me) was saved! Home Assistant OS started and proper IP address in my private subnet was acquired by it. It felt great to come back to the world of wonders and conveniences that Home Assistant brings 🥹
But I want it fast!
Main disadvantage of method described above is high performance penalty due to emulation instead of virtualization. This is high price I had to pay to run my HA instance for a week. Even though this is not that big of a deal for simple Home Assistance installation, it can become one if you add more stuff there or maybe run other more demanding operating system.
If you want to test Home Assistant and you don’t have spare server, PC, Raspberry Pi… But you rock some Apple gear, then here is what to do.
I was able to run arm64 image of Home Assistant (grab on with vmdk format) by going through setup of Linux VM. In the beginning just set anything for boot image since it is required (but not validated). Then step through rest of the setup. In the end delete disk images in VM configuration screen and create new with provided image. For interface select VirtIO, then select import and choose downloaded arm64 image of Home Assistant. Start up the machine and here you go - and much faster you will go :)
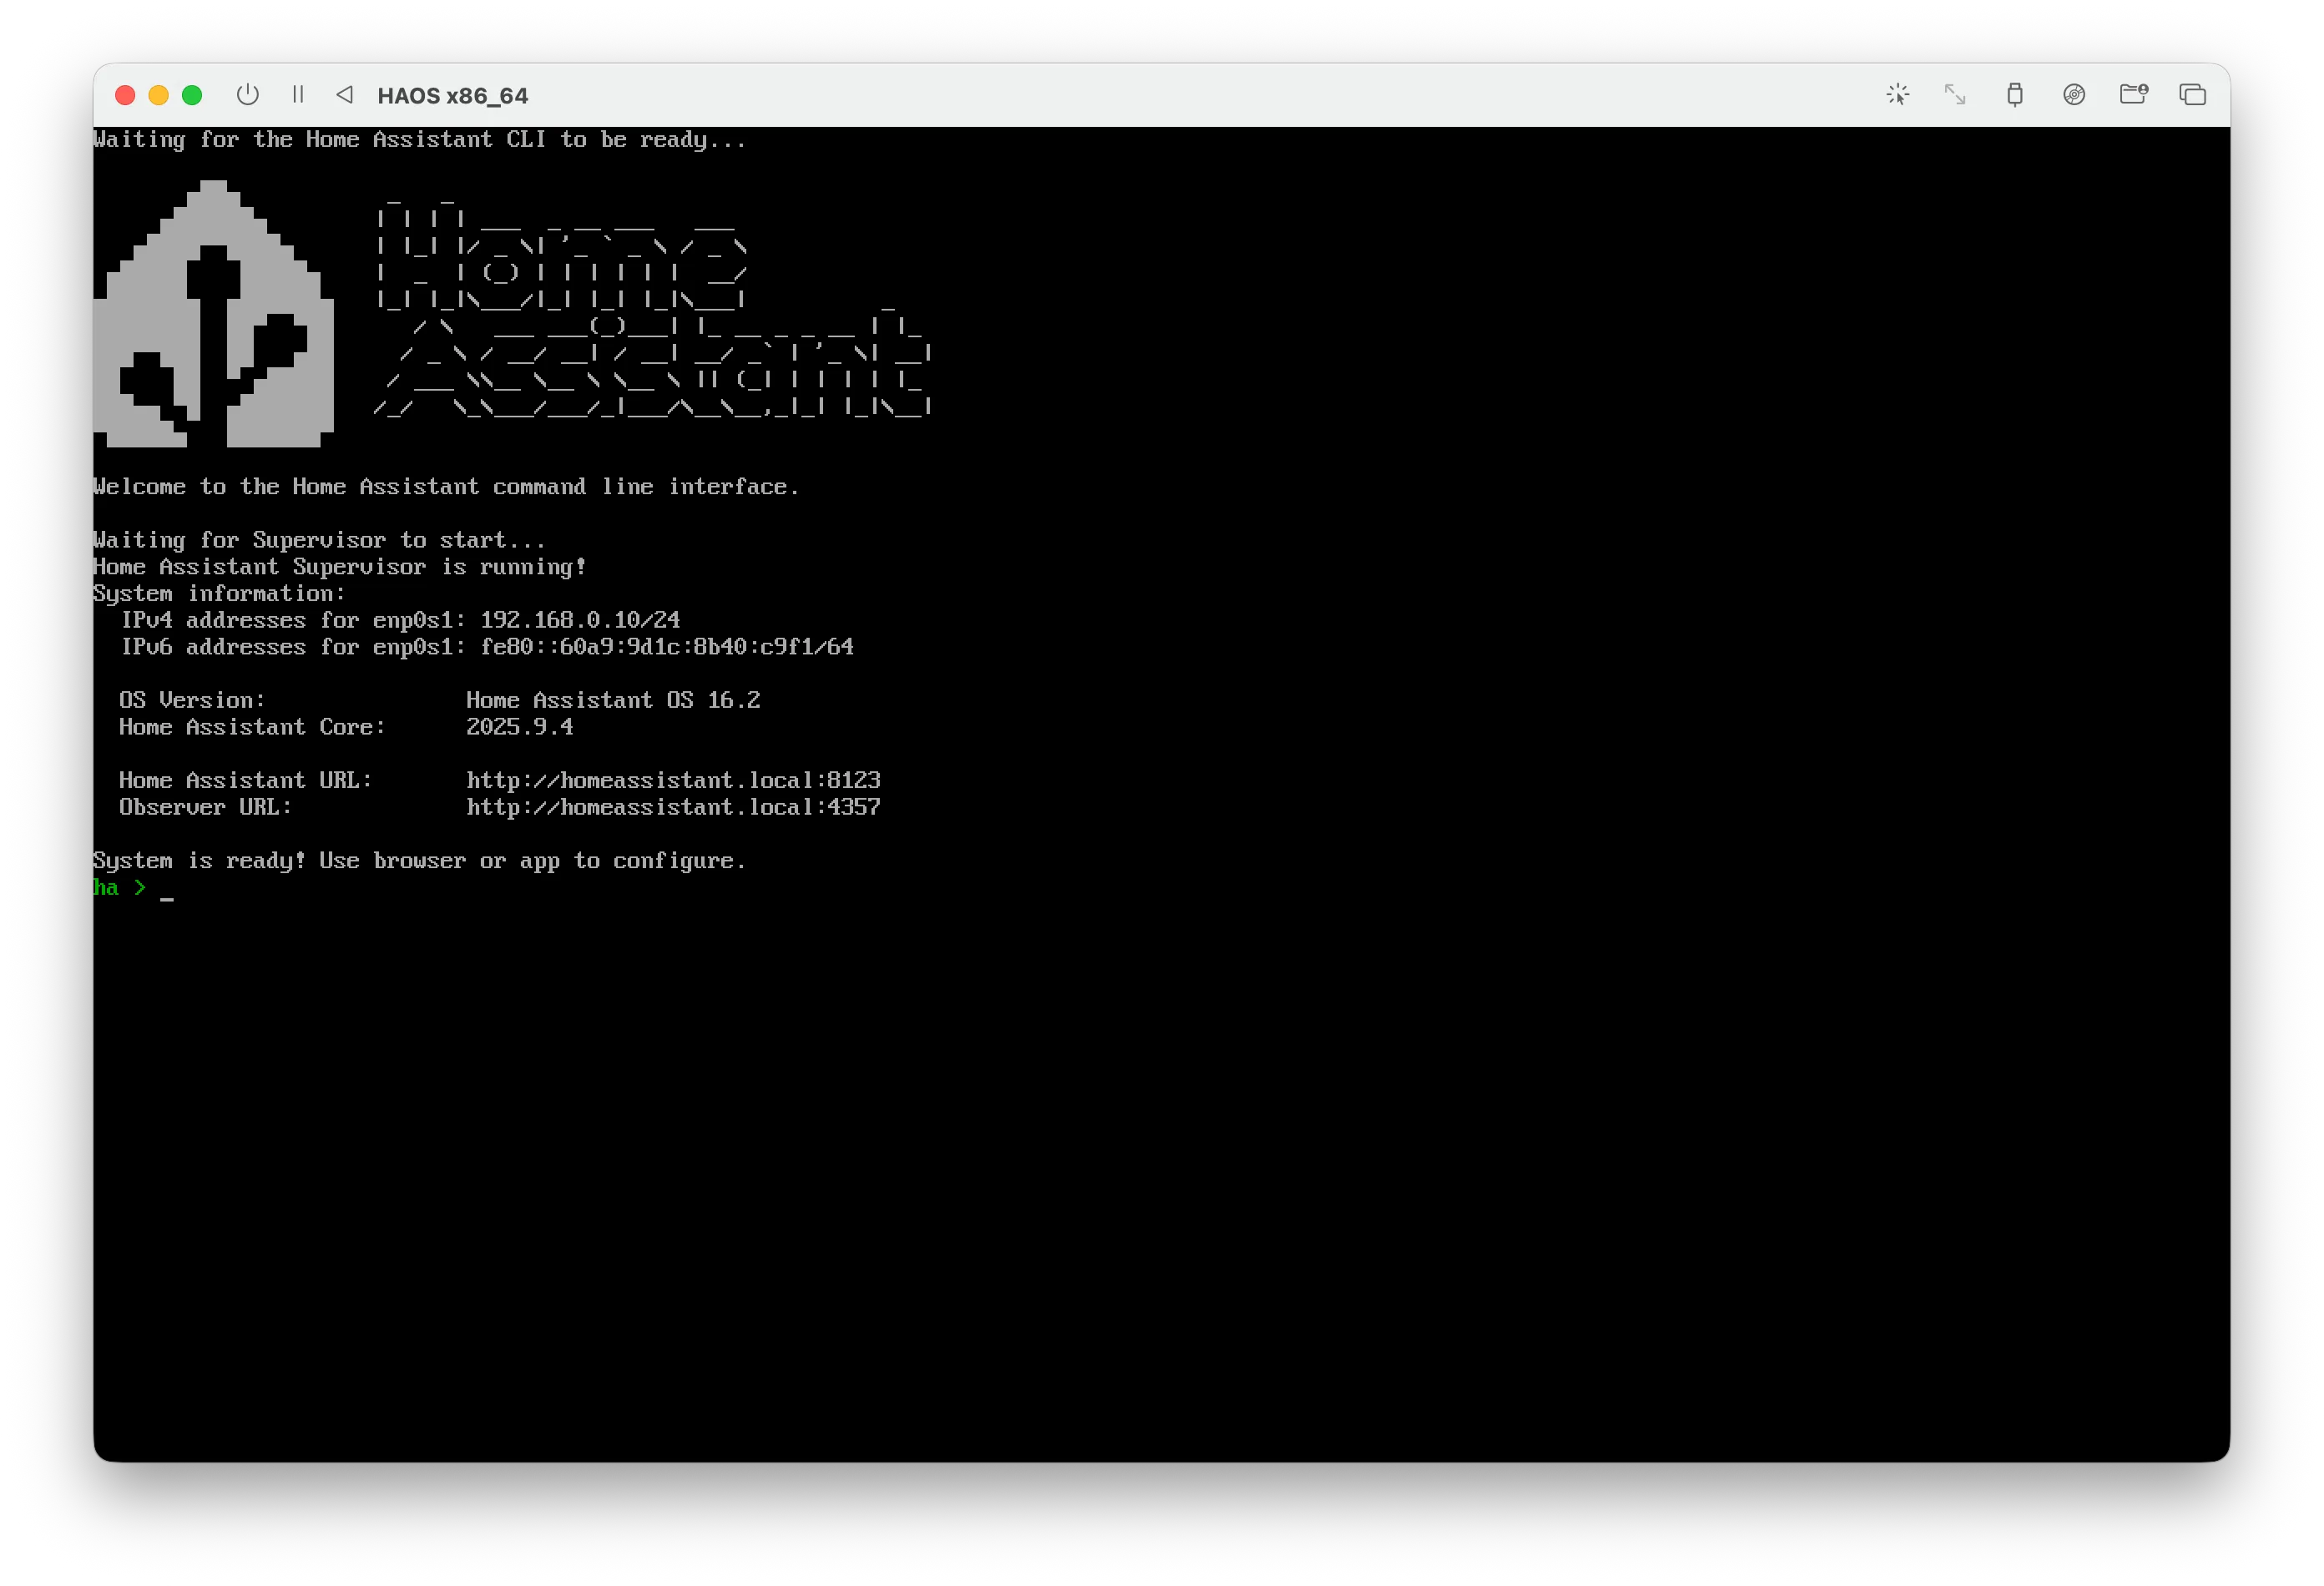
Here you have sumary of the whole process in few screenshots:
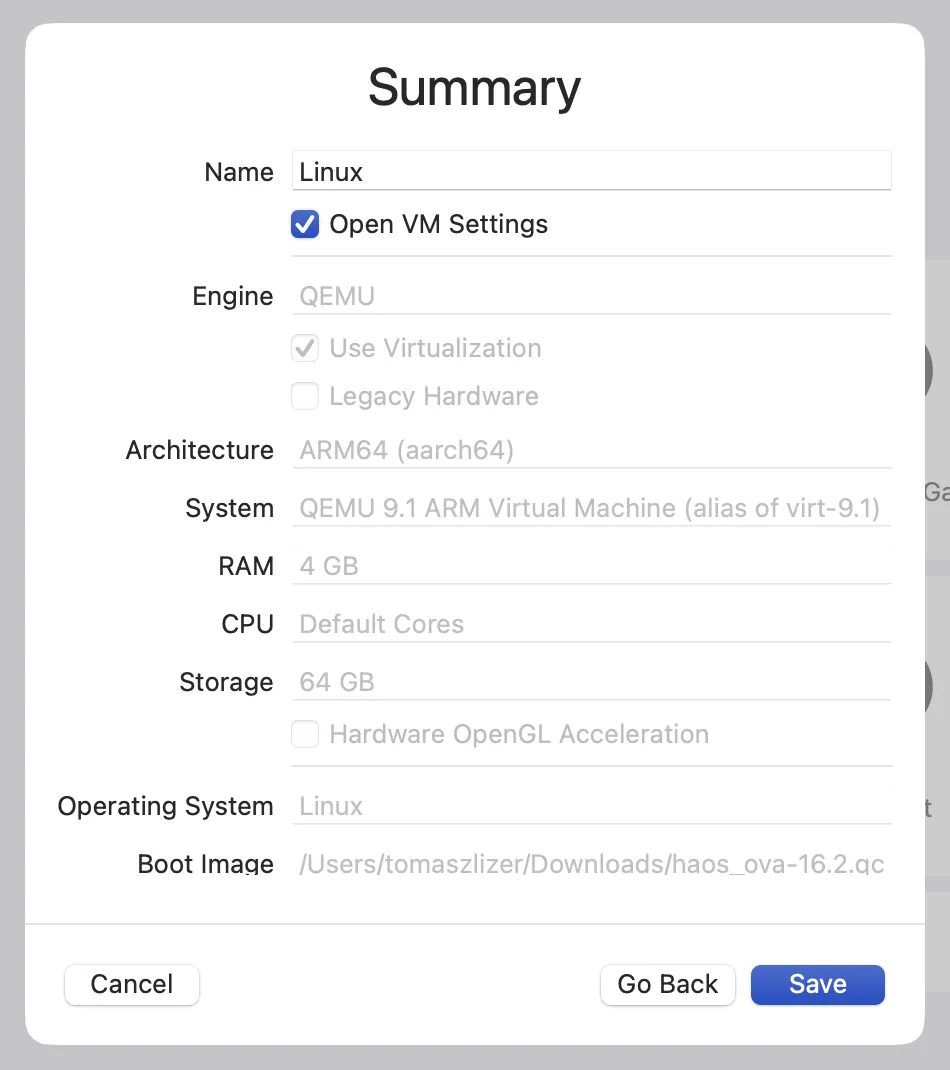
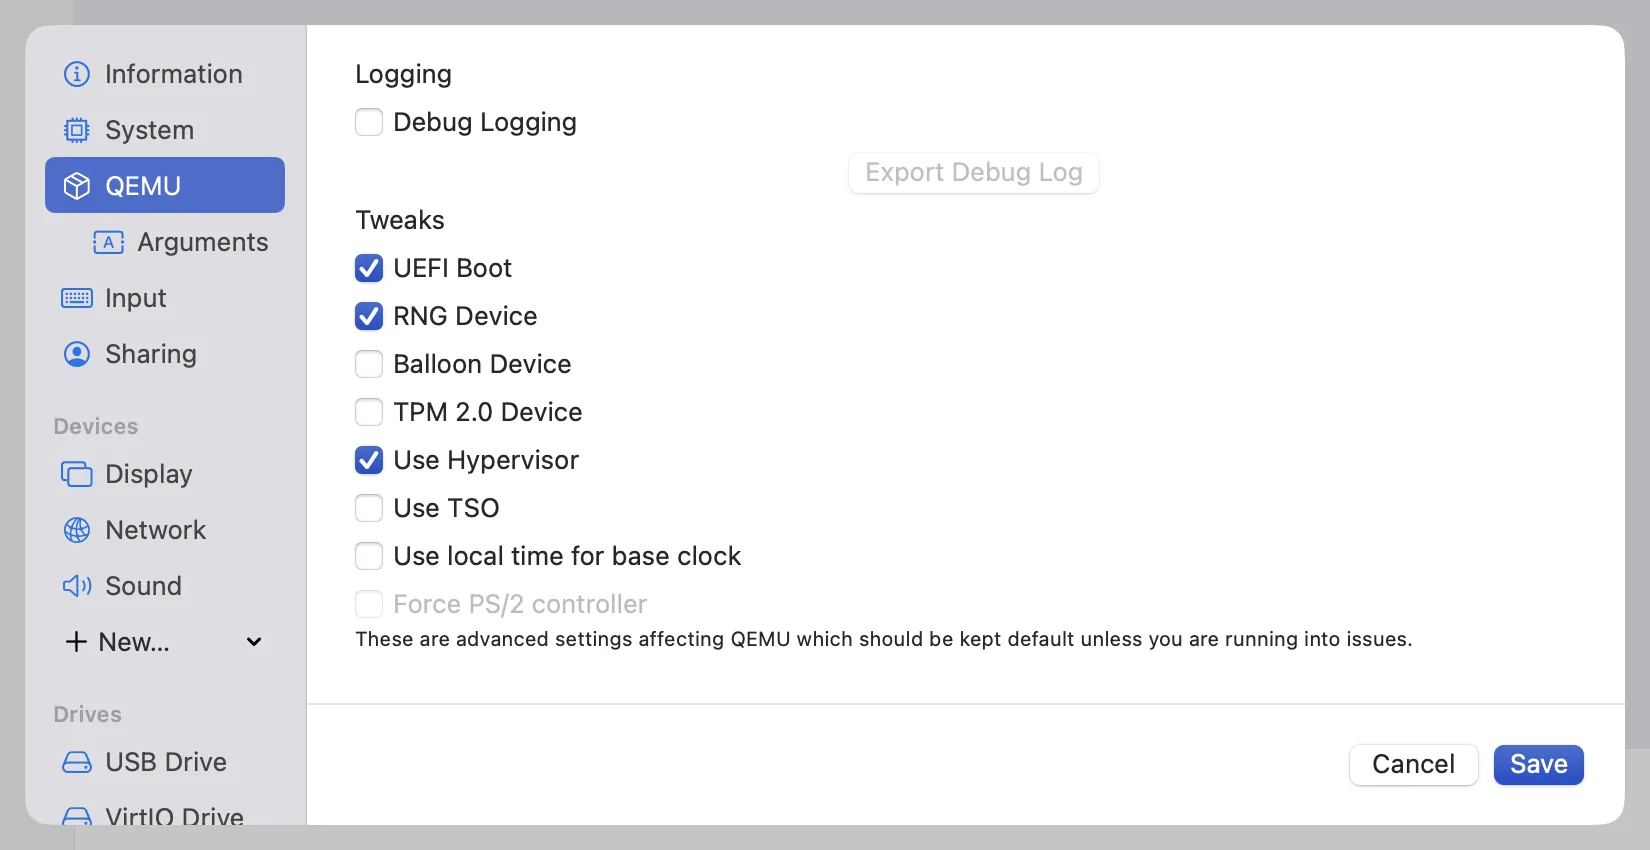
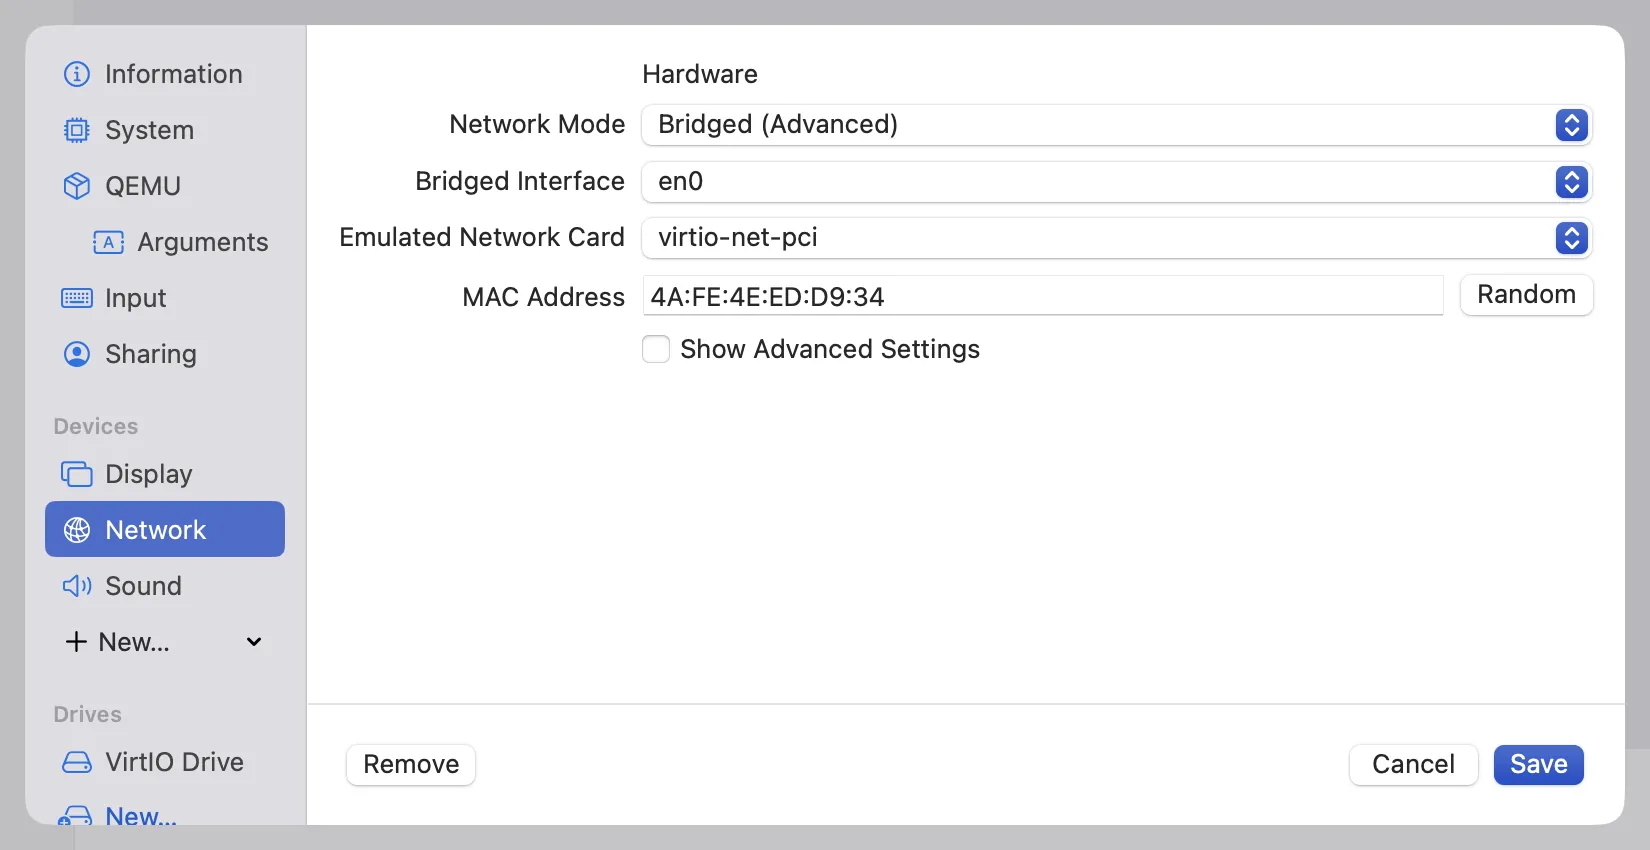
It is incredible how much we can do with todays software. Running fully emulated operating system on different CPU architecture just on your laptop and it drives your home :) If you ended up in situation similar to mine, or maybe you just want to tinker with Home Assistant or any other VM - UTM is there to server you and does it well. The more I discover, the more amazed about current state of technology I am. Hope that you too 😄